Preparation for a Webinar in the Browser
How to Create a Webinar Using a Ready-Made Template
In this article, you will learn how to quickly create webinars using a ready-made template on the VKURSE platform, with standard settings.
In our application, you can create a webinar using a ready-made template. The ready-made template allows you to quickly create an event that will start automatically with standard settings.
Let's create a webinar using a ready-made template.
STEP 1: Log in to your personal account on the VKURSE platform. To log in to your personal account, use the Login and Password for the VKURSE platform. You can learn how to authorize on the VKURSE platform in this article (link the link to "this article").
STEP 2: In your personal account, go to the Events tab. Click on the Create Event room (green plus sign).
STEP 3: In the pop-up window, select "Start Now" and click on the Webinar template. After that, the event will start automatically.
STEP 4: After entering the event, the VKURSE platform will prompt you to configure the equipment.
STEP 5: After applying the equipment settings, you will have access to the functions of the organizer/moderator of this event. More information about the roles can be found in this article (link the link to "this article"). More information about the functionality available to the organizer/moderator can be found in this article (link the link to "this article").
STEP 6: To invite participants, we recommend sending connection links. More information on where to get connection links can be found in this article. (link the link to "this article")
STEP 7: The event is created, participants are invited, all that's left is to wait for the participants to connect and start broadcasting.
How to Schedule a Webinar
In this article, you will learn how to schedule a webinar on the VKURSE platform.
In our application, you can schedule a webinar for a convenient date and time, set it as recurring, enable synchronous translation, add a waiting room for uninvited participants, ensure continuous display of participants on video, and also divide them into groups. All settings and functions can be found in this article.
To schedule a webinar, follow these steps:
STEP 1: Log in to your personal account on the VKURSE platform. Use the Login and Password for the VKURSE platform to log in to your personal account.
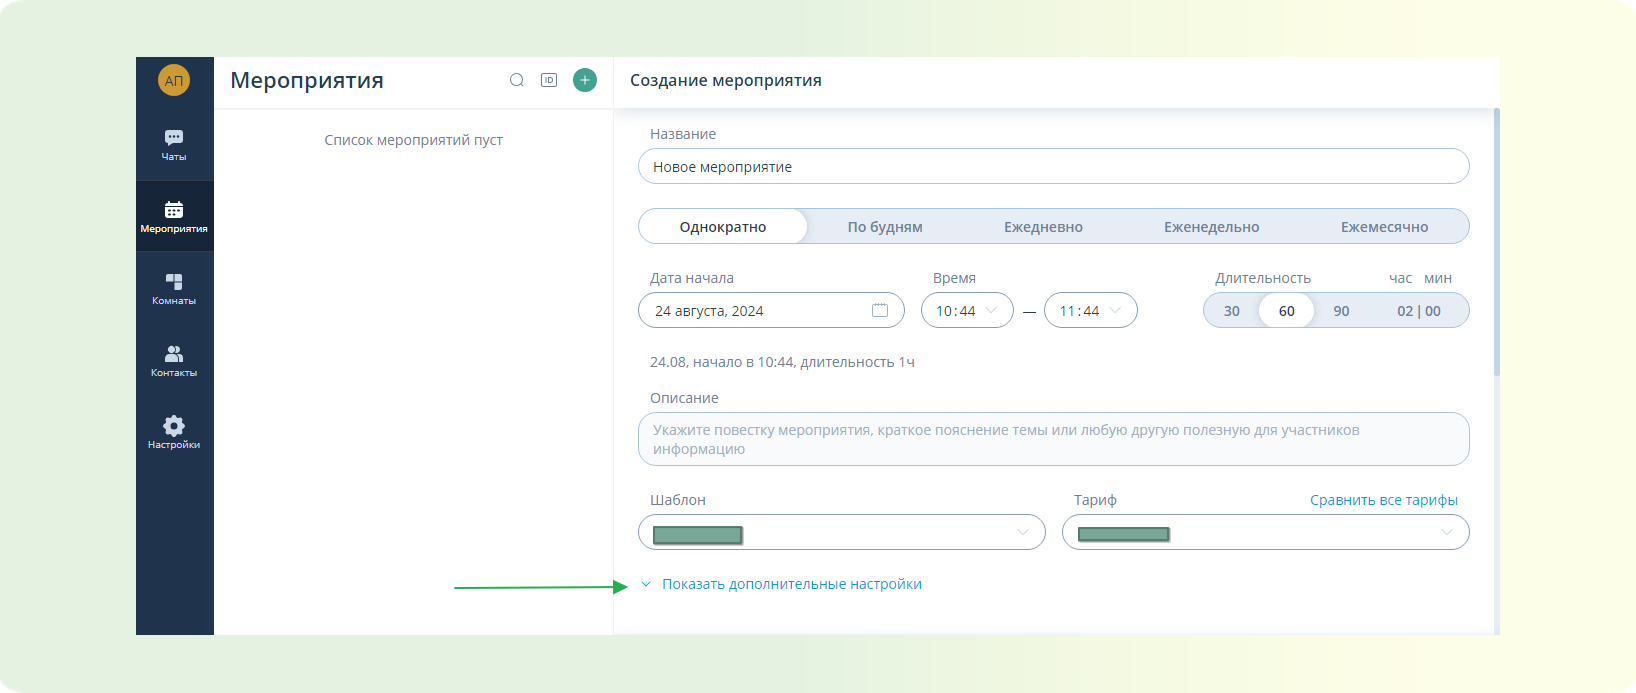
STEP 2: In your personal account, go to the Events tab. Click on the Create Event room (green plus sign).
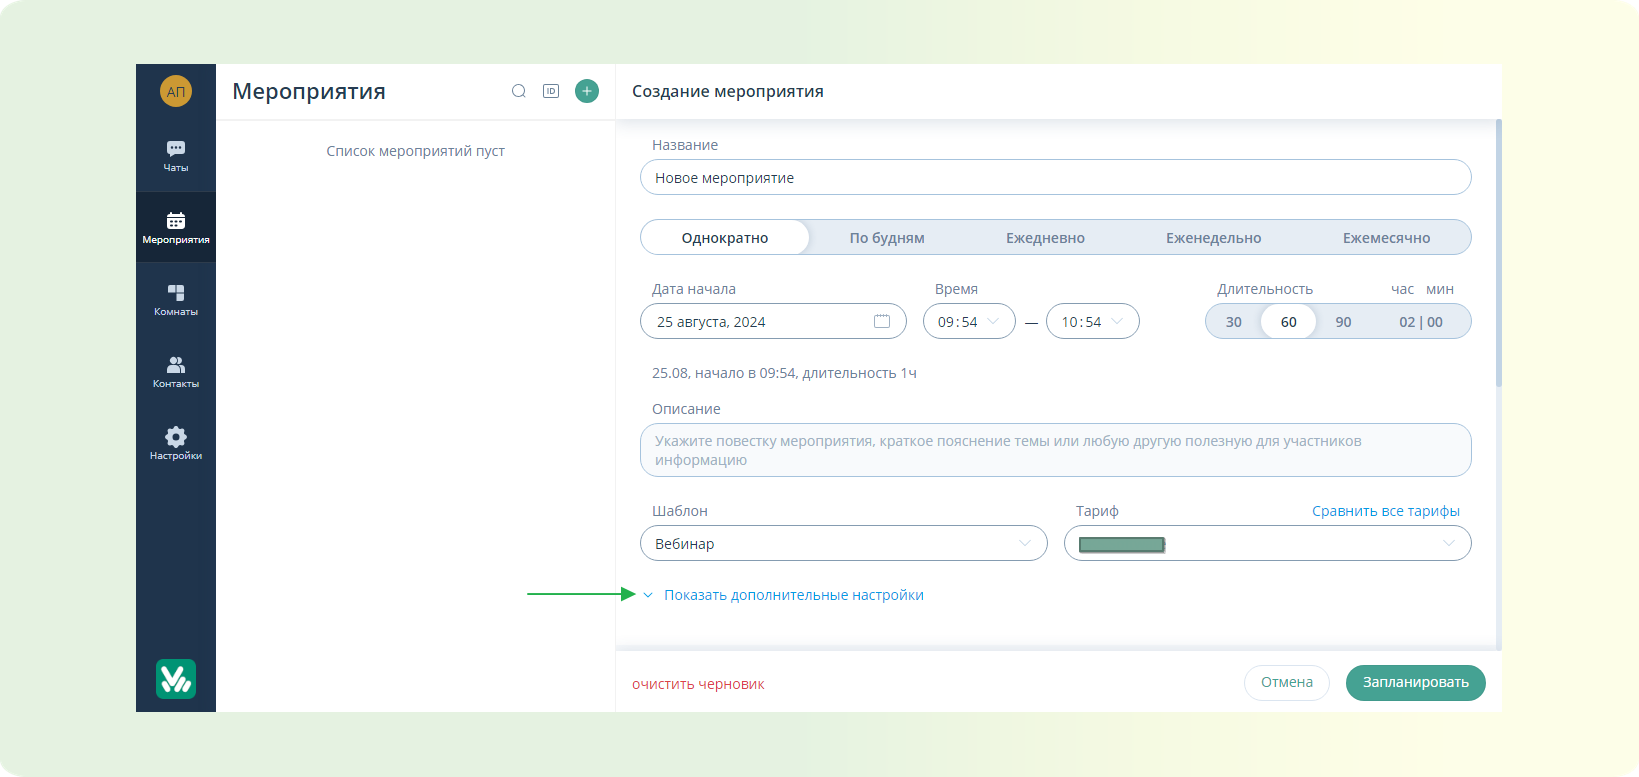
STEP 3: In the pop-up window, select "Schedule" and click on the "Event" button. After that, a planning window for the event will open on the right side of the screen.
STEP 4: Enter the event name. Choose whether the event will be one-time or recurring. Specify the exact date and time of the event start, specify the duration of the event and the description of the event if necessary. Choose the Webinar event template.
STEP 5: When selecting the template for the event, standard settings are applied. More details on the list of standard settings can be found in this article. To enable or disable the necessary settings, click on the "Show additional settings" button.
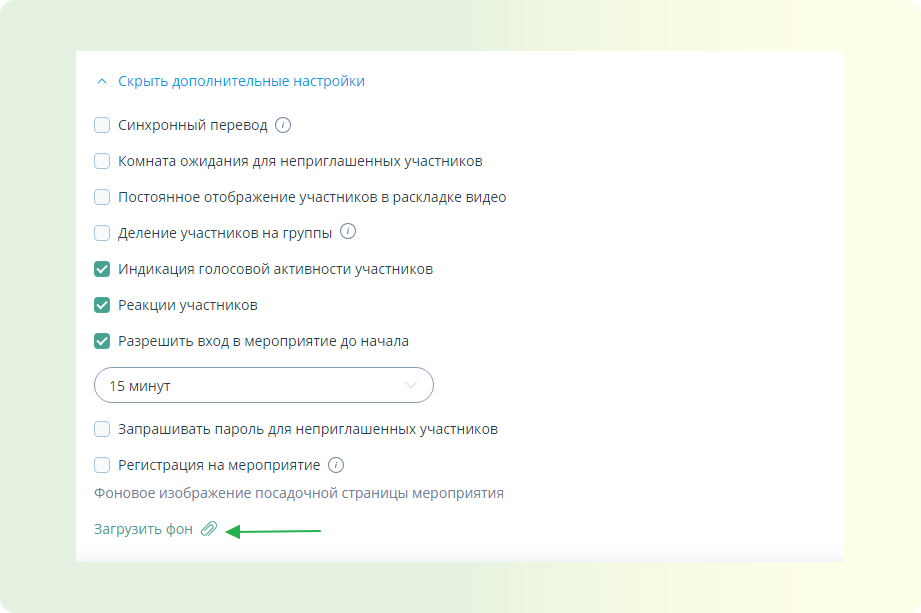
STEP 6: In the list of settings that appears, you can see the list of standard settings that are enabled by default when selecting the Webinar template and the list of additional settings that are disabled. More details on each setting can be found in this article.
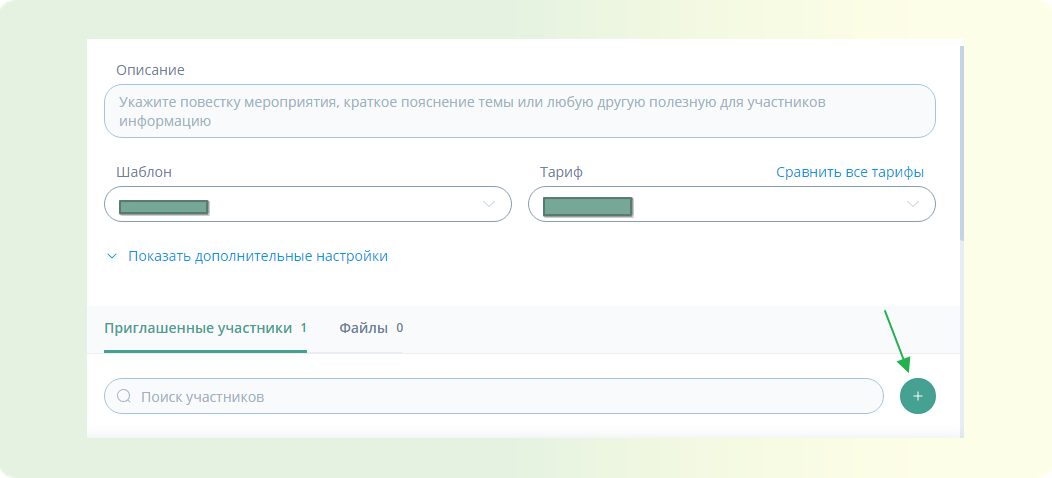
STEP 7: Invite participants to the event. When planning, there are two ways to invite participants to the event.
- Invite participants one by one using the "Add participants" function.
- Invite up to 300 participants simultaneously using the "Add participants - Import" function.
- After creating the event, copy the necessary connection links from the calendar or event settings functionality. More information on these methods of inviting participants can be found in this article.
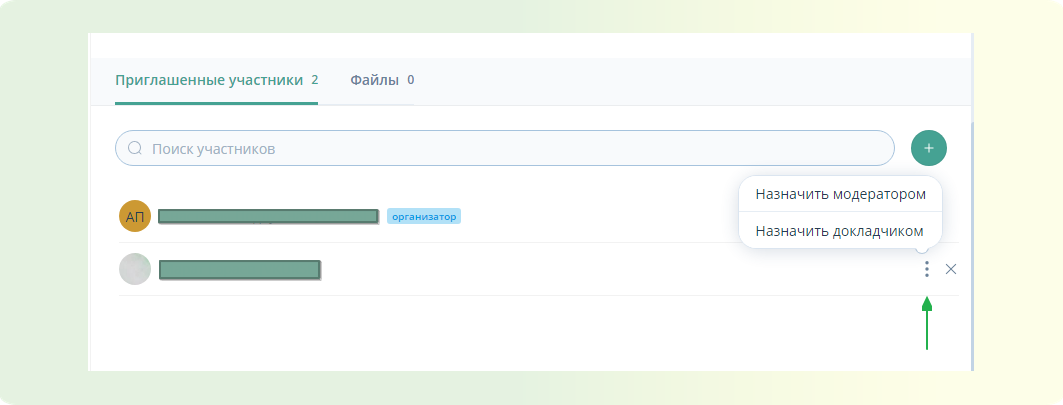
STEP 8: If you need to appoint moderators or speakers for the event immediately, you can do so in the list of added participants. Find the necessary participant in the list - click on the three dots next to their name - select a role for this participant. More information on the functionality available to participants with different roles can be found in this article.
STEP 9: Then click the "Schedule" button. After that, the event will appear in the calendar of your personal account, and invited participants will receive an email with connection links.
How to Create a Webinar with a Registration Form
In this article, you will learn how to create a webinar with a registration form on the VKURSE platform.
The "Registration Form" feature on the VKURSE platform for webinars simplifies the participant registration process. It allows you to collect important data and efficiently manage the list of participants, making your webinar more organized and successful.
For more information on how to create a scheduled webinar, you can read this article. Let's see how to set up a registration form for your event.
STEP 1: Main event settings
- Go to the "Additional settings" section.
- Select "Registration for the event".
- Go to "Registration form settings".
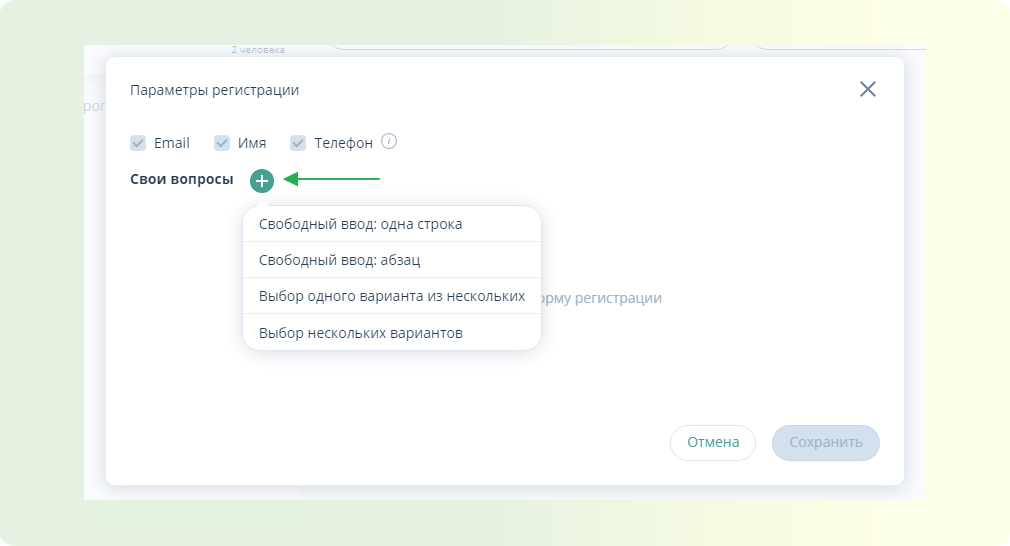
- By default, the email, Name, and Phone fields are mandatory.

STEP 2: Adding to the registration form
- Click to select and add additional items to the registration form.
- Available options: free text input (one line), free text input (paragraph), select one option from several, select multiple options.
STEP 3: Completing the setup
- Click the "Schedule" button.
- The webinar with a registration form is created. For more information on inviting participants to the event, you can read this article.
How to Invite Participants to an Event During Planning
In this article, you will learn how to invite participants during planning using all available methods on the VKURSE platform.
In our application, you can invite participants to the event in three ways. Each method is unique and serves different purposes.
Let's look at these methods:
METHOD 1: Inviting users to the event one by one via the participant's email.
STEP 1: When planning the event, click the "Add participants" button (green plus).
STEP 2: Select a participant from the available contact list or enter the email of the intended participant in the search bar - Check the box next to the participant - Click the "Add" button.
NOTE
In this method, the invited participant will receive a personal connection link to the specified email, which only they can use to join the event.
METHOD 2: Mass invitation of users to the event using the "Import" function (up to 300 participants simultaneously)
STEP 1: When planning the event, click the "Add participants" button (green plus).
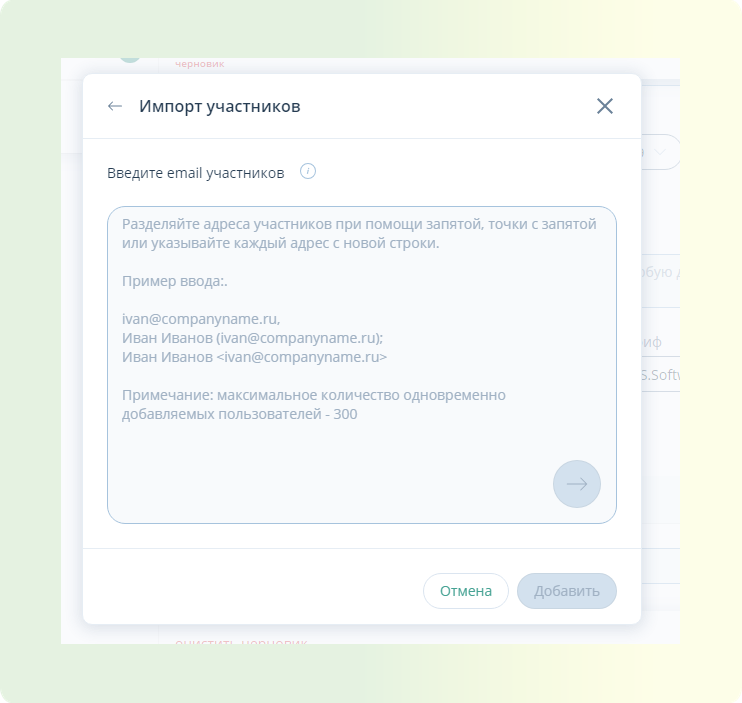
STEP 2: In the "Add participants" window, click the "Import" button.

STEP 3: In the email address input field, enter the required addresses, separating them with a comma, semicolon, or specify each new address on a new line.
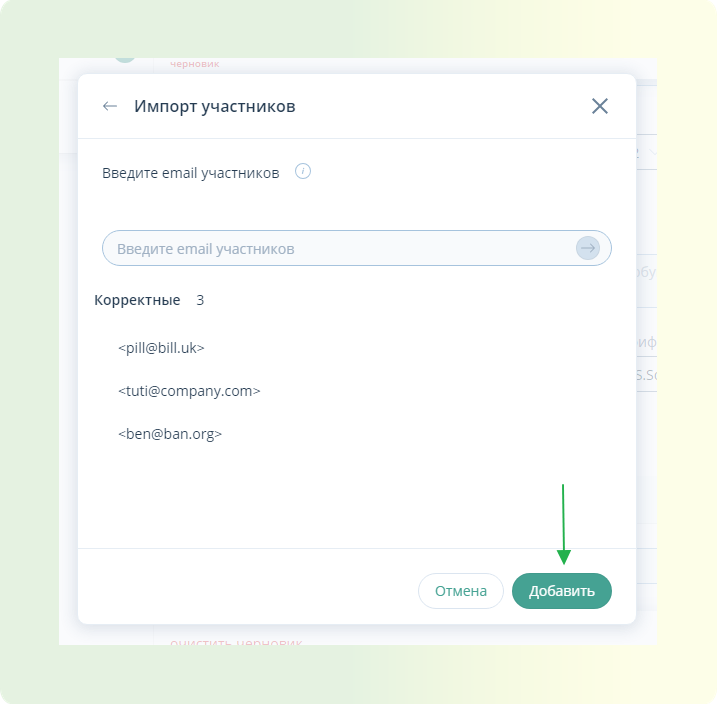
STEP 4: Click the "Add" button (green arrow) - Check the correctness of the email addresses - Click the "Add" button.
NOTE
In this method, the invited participant will receive a personal connection link to the specified email, which only they can use to join the event.
METHOD 3: Sending participants links to join from the scheduled event panel.
STEP 1: Go to the "Events" tab in the application. Select the desired event.
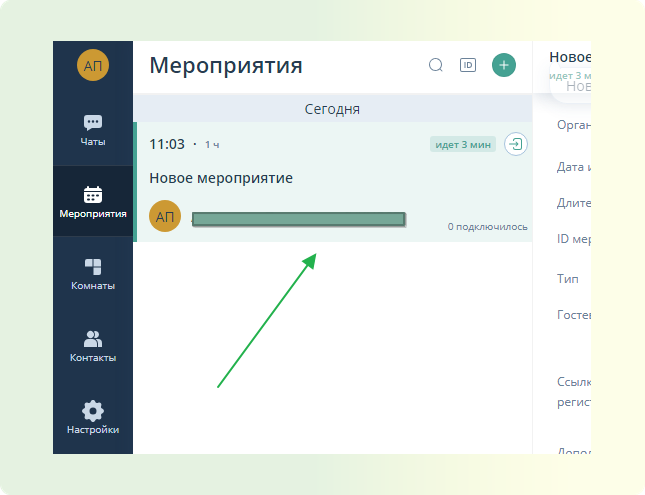
STEP 2: In the event panel that opens, click the "Additional links" button - A window with all available connection links to the event will open.
STEP 3: Copy the necessary links (for the guest, moderator, organizer) and send them to the participants using any convenient method.
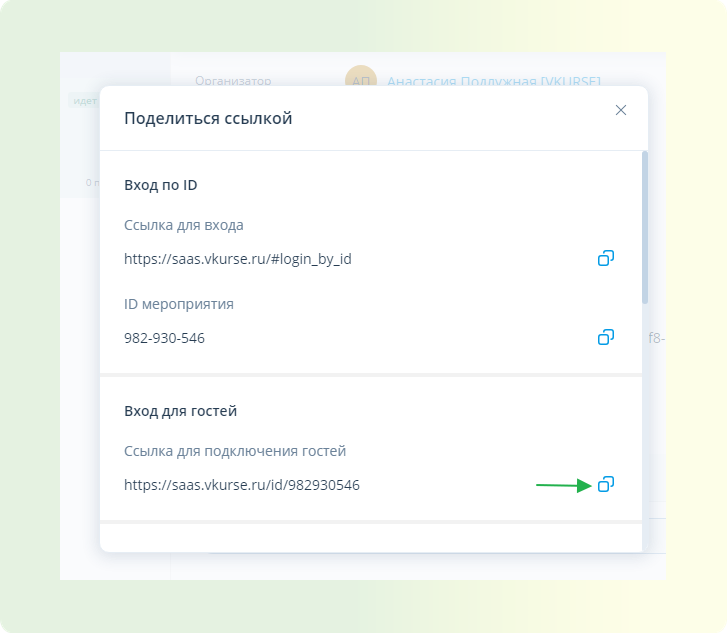
NOTE
In this method, you send the participant a guest link, which any user can use to connect. If the connection is not restricted by event settings. For more information on event settings, you can read this article.
How to Set a Background in an Event
In this article, you will learn how to upload and set a background image for the event page.
This feature allows you to create a unique atmosphere for the event, visually emphasizing its style and theme with an attractive background image on the landing page.
STEP 1: Schedule the event.
STEP 2: Open additional settings When planning the event, find and click on the "Show additional settings" button.
STEP 3: Select a background image Expand the dropdown list and select "Event landing page background image".
STEP 4: Upload the background image Upload the image to be used as the background. Supported file formats: JPEG, JPG, PNG, BMP. Maximum image size: 2048 x 1024 pixels or smaller while maintaining proportions.
STEP 5: Display the background After uploading, the selected image will immediately appear on the landing page.
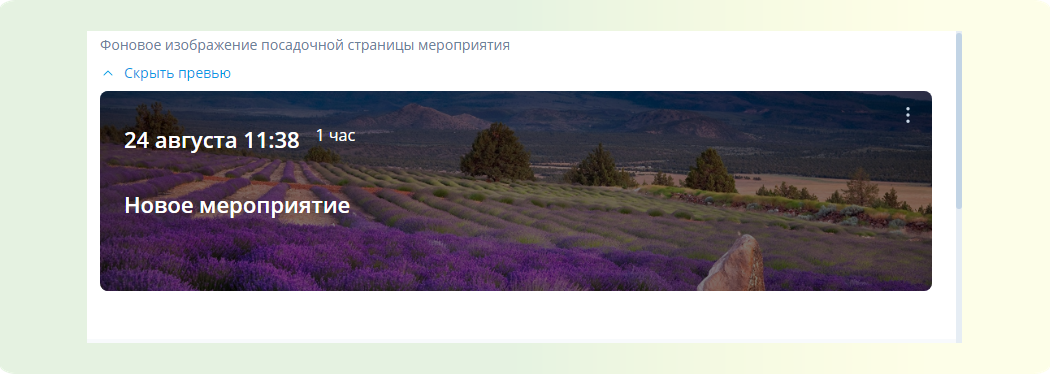
STEP 6: Edit or delete the background image To change or delete the background image, go to the "three vertical dots" menu and perform the necessary actions.
How to Appoint a Moderator / Speaker
In this article, you will learn how to appoint a moderator / speaker for events on the VKURSE platform.
Assigning roles such as moderator and speaker is necessary for effective event management on our platform, ensuring order and clear task execution by participants.
Definitions
Organizer / Moderator - An event participant with access to all event management functionality. The difference between an organizer and a moderator is that an organizer is the person who created the event in their personal account. More information about the personal account can be found in this article.
Speaker - An event participant with the ability to speak and show content, but without the ability to configure the event, manage the rights of regular participants.
Regular Participant - Within the webinar, can listen and watch the event, take surveys, use the whiteboard, write in the chat.
Appointing a moderator / speaker can be done in three ways. Let's look at them.
METHOD 1: Appointing a Moderator / Speaker by sending guest links for the moderator / speaker to connect
STEP 1: Log in to your personal account. Go to the Events tab. Enter the event.
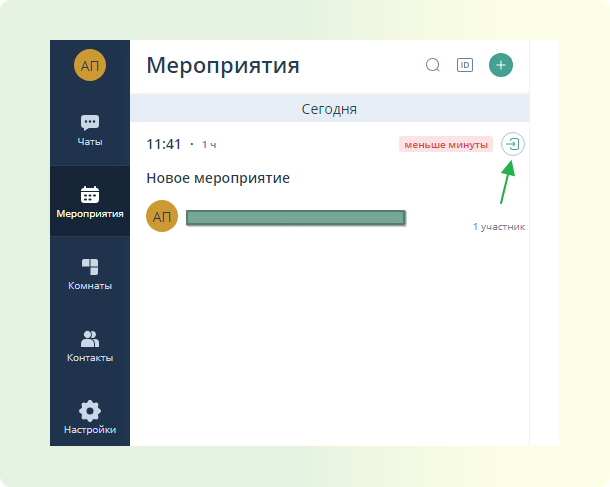
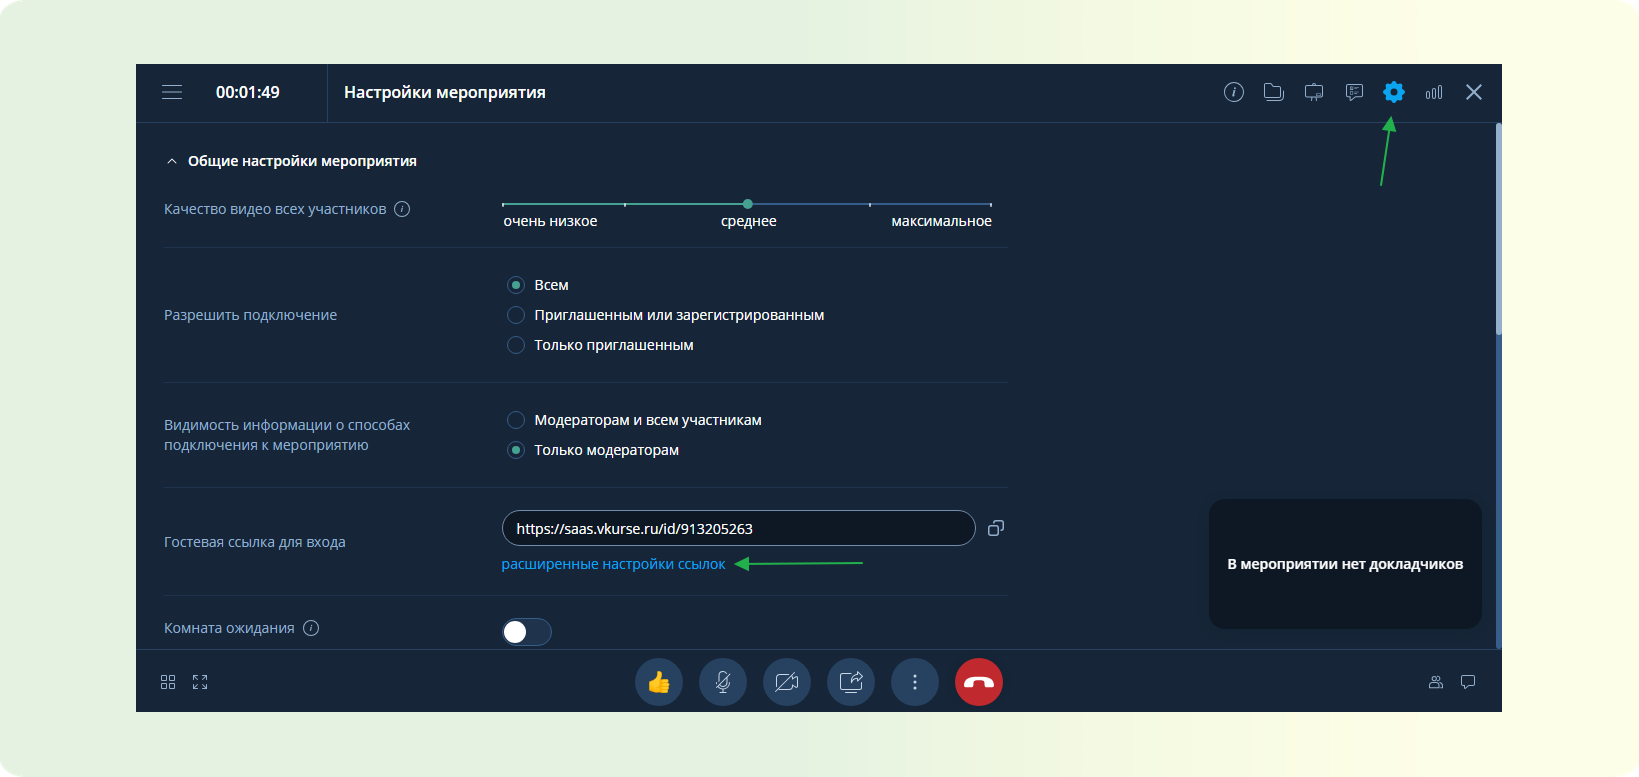
STEP 2: In the event, go to "Settings" (gear icon). Under "Guest login link," find the "advanced link settings" button and click on it.
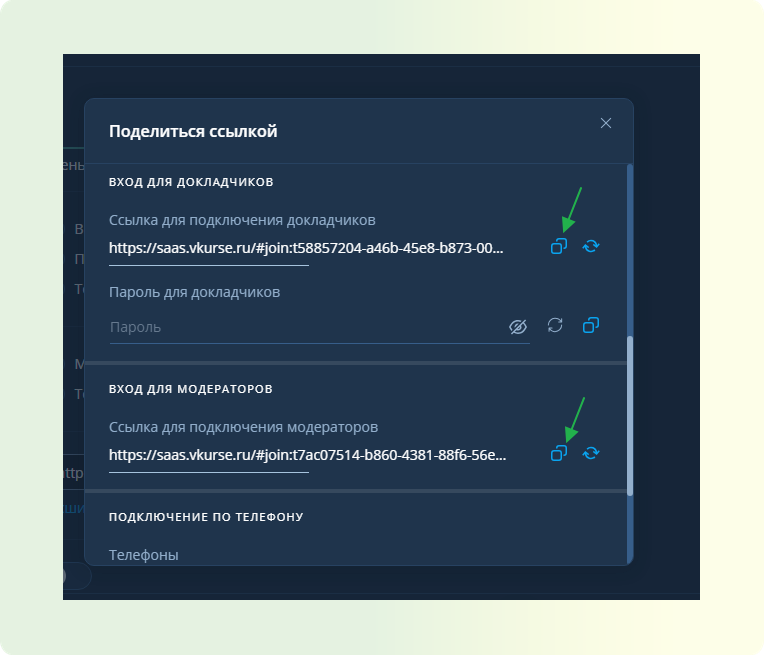
STEP 3: From the dropdown list, copy the link for the moderator / speaker and send it to the participant in any way convenient to you.
METHOD 2: Appointing a Moderator / Speaker when planning the event.
STEP 1: During event planning, add the participant to the list of participants. More information on adding participants during planning can be found in this article.
STEP 2: Click on the three vertical dots next to the participant's name and select "Appoint as moderator" or "Appoint as speaker."
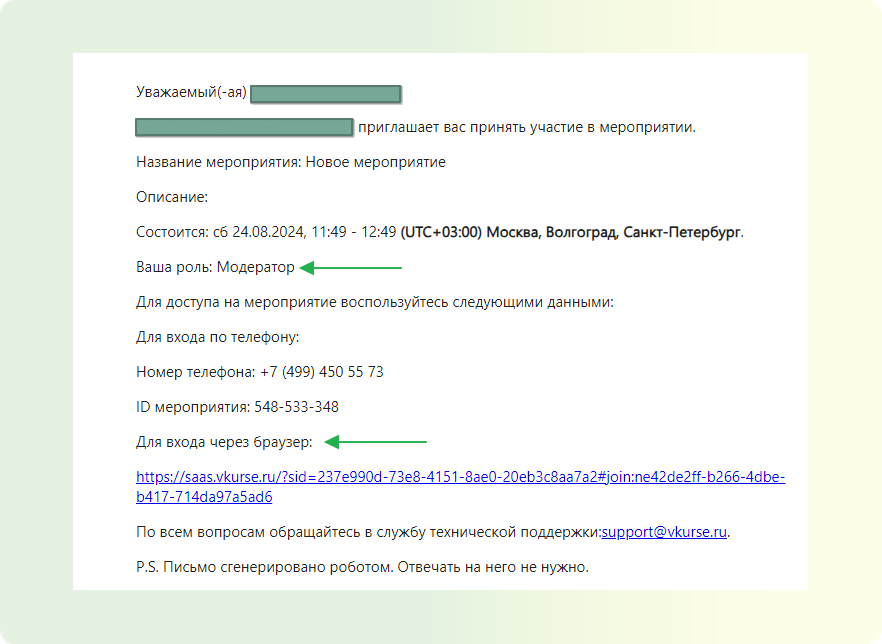
STEP 3: Click the "Schedule" button. After that, the appointed participants will receive an invitation with personal moderator / speaker links and the role will be indicated.
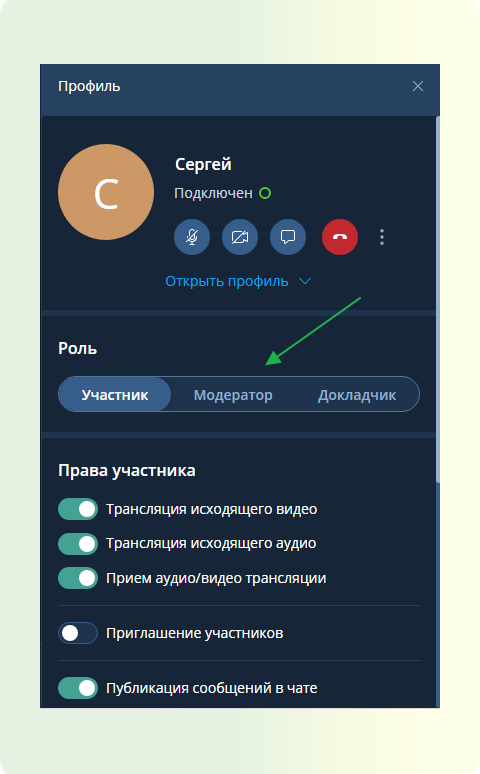
METHOD 3: Appointing a Moderator / Speaker during the event.
STEP 1: During the event, go to the participant management panel, click on the necessary participant from the list.
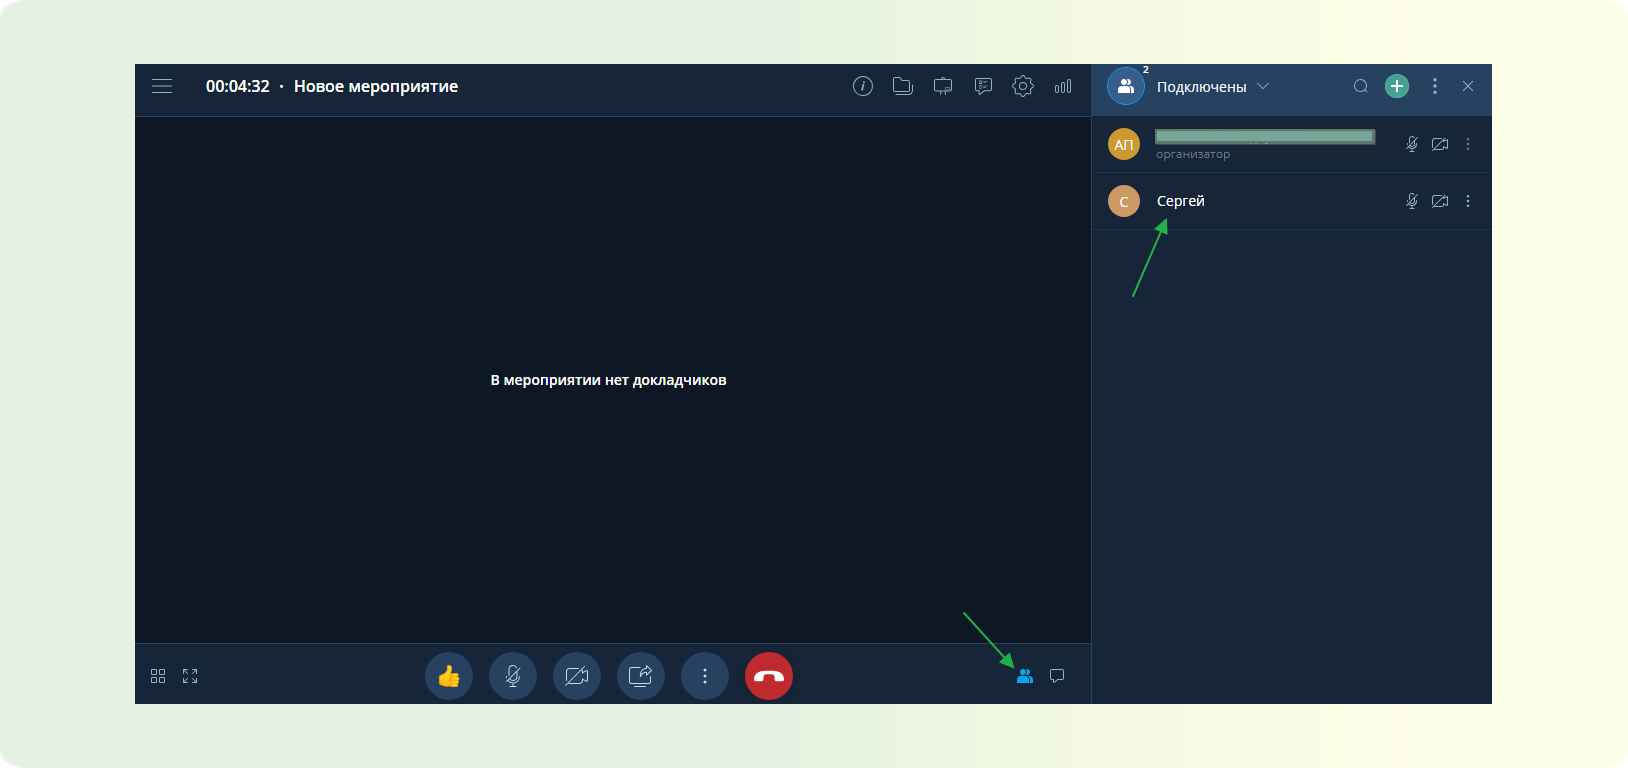
STEP 2: The participant settings panel will open. In the "Role" section, change the role to the required one. More information on the capabilities of participants with different roles can be found in this article.