Android Application
Install the application
Scan the QR code or follow this link
How to Create a Chat
In this article, you will learn how to create chats in the VKURSE mobile application.
The chat feature on our platform allows you to communicate quickly and conveniently with people in real-time.
Let's see how to create a chat in our mobile application.
STEP 1: Launch the application Open the application on your phone. Learn more about how to install and log in to our mobile application in this article.
STEP 2: Opening the default block The application will automatically open in the default "Chats" block.
STEP 3: Selecting a contact Select the necessary contact for communication using the "New Chat" button, the + sign, then after selecting, press the green checkmark in the right corner of the screen.
STEP 5: Automatic chat creation. After pressing the green checkmark, the chat will open automatically.
LIST OF AVAILABLE CHAT FEATURES.
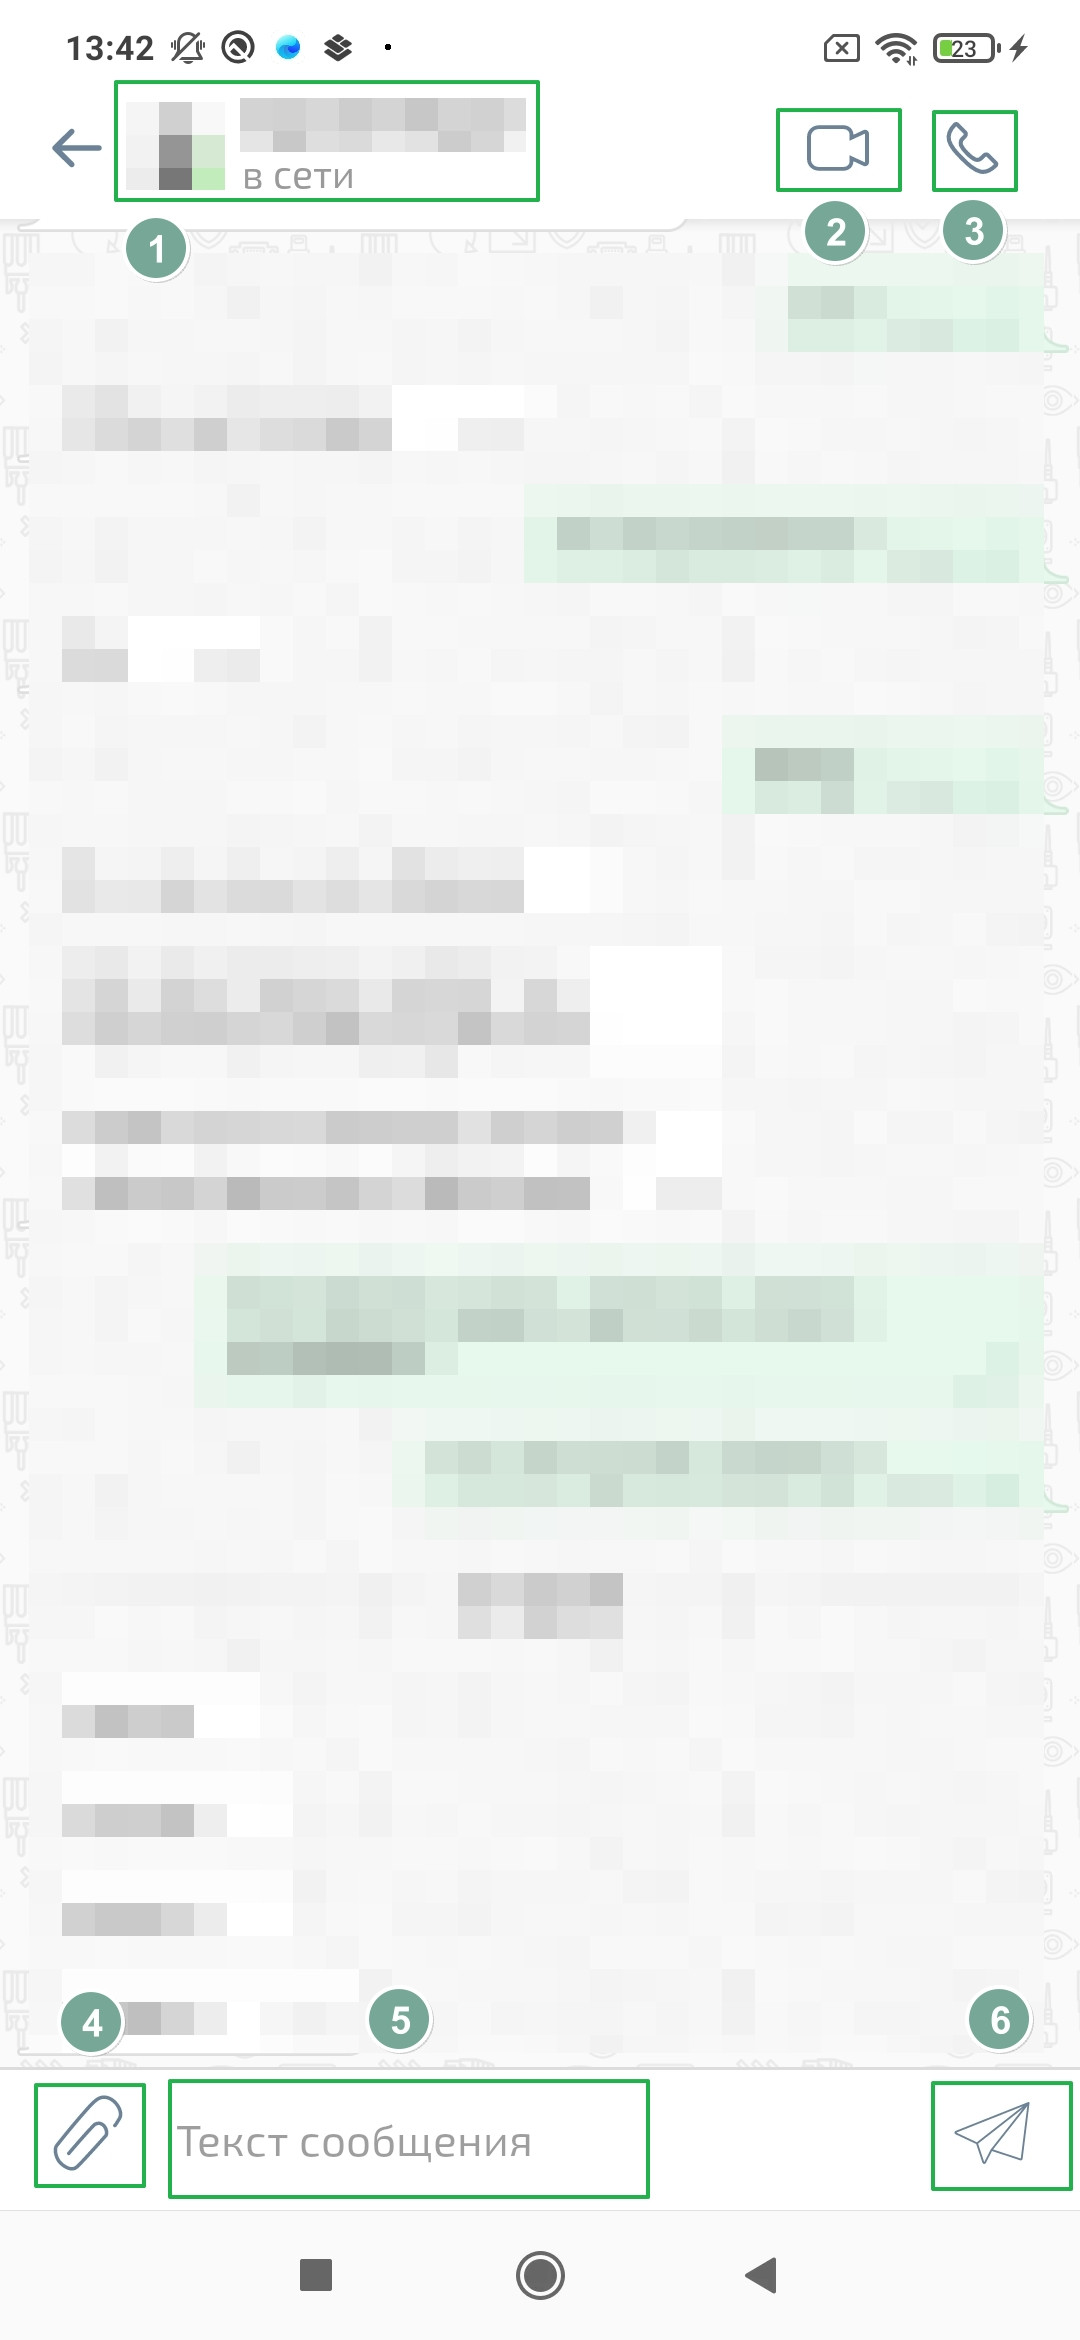
- View interlocutor profile / Manage chat allows:
- view the interlocutor's profile;
- open the Gallery for easy search of attachments;
- block / unblock notifications from this chat;
- Clear messages in the chat;
- Delete the chat with all its contents.
- Video call - allows calling in video format;
- Audio call - allows calling in audio format;
- Attach files - allows attaching the necessary file. To transfer files and images, the application needs access to the device;
- Text input field - necessary for displaying the written message;
- "Send" button - sends the message to the interlocutor when pressed.
How to Create a Group Chat
In this article, you will learn how to create group chats in the VKURSE mobile application.
The group chat feature in our application allows you to bring people together for joint discussions and idea sharing in one space. It is a convenient way to stay connected with the team, share information, and resolve issues instantly, ensuring effective real-time interaction.
In our application, it is possible to create a group chat in two ways, let's look at both.
METHOD 1: Creating a group chat from a personal chat.
STEP 1: Go to a personal chat with any interlocutor. Go to a personal chat with any interlocutor - click on the interlocutor's profile avatar - Click the "Create Group Chat" button
STEP 2: Choosing the necessary interlocutors.
From the list that appears, select the necessary interlocutors - check their names - press the green checkmark in the upper right corner.
STEP 3: Chat created.
METHOD 2: Creating a group chat using the "New Chat" function
STEP 1: Enter the application. Enter the application, by default it will open in the "Chats" tab.
STEP 2: Creating a chat. In the "Chats" tab, in the upper right corner, press the "New Chat" button, the + sign.
STEP 3: Selecting chat participants. From the list of contacts that appears, select the necessary participants or use the search, press the green checkmark in the upper right corner.
STEP 4: Chat created.
LIST OF GROUP CHAT FEATURES:
- About chat - opens the functionality to manage the group chat, allows:
- Change the chat avatar;
- Edit the name;
- View the chat gallery, all attachments;
- Enable the feature to save chat history for new participants;
- Turn on / off chat notifications;
- Manage participants;
- Leave the chat;
- Clear the chat;
- Delete the chat.
- Group audio call - allows making an audio call simultaneously to all chat participants;
- Group video call - allows making a video call simultaneously to all chat participants;
- Attach files - allows attaching a file;
- Text input field - displays the typed message;
- Send button - sends the message.
How to Create an Event / Room in the Mobile Application
In this article, you will learn how to create events and rooms in the VKURSE mobile application.
In our application, you can plan or create an event / room using ready-made templates. This feature allows you to create events when you do not have access to a personal computer.
Let's see how to create an event / room.
STEP 1: Enter the application. Open the application on your mobile device
STEP 2: Go to the events / rooms tab. Go to the events / rooms tab.
STEP 3: Creating an event. In the upper right corner of the screen, press the "Create Event / Room" green + button, the event creation functionality will open.
STEP 4: Setting room parameters. Set the event parameters, for example: name, template, date, start time, duration, etc.
STEP 5: Completing creation. Event start. Press the green checkmark in the upper right corner, the event is ready. Depending on the set time, it will automatically start and be active.
IMPORTANT
- Detailed setting of the event or room is available only in the application versions for personal computers.
- When creating an event, you can start it immediately using the "Start Now" function, for this at STEP 3 after pressing + select "Start Now".
- Since a room is an event without a start and end, there are no time setting items when creating, this is a normal situation.
How to Connect to an Event
In this article, you will learn how to connect to an event as an authorized user in the VKURSE application.
Connecting to an event via a link is a simple and convenient process. You do not need to search for and remember complex data for entry, which significantly speeds up and simplifies connecting to the event.
STEP 1: Launch the application. Launch the application on your mobile phone.
STEP 2: Go to the "Events" tab. In the application, go to the "Events" tab.
STEP 3: Feed of planned events. After moving, you will see a feed of planned events. Find the necessary one.
STEP 4: If the event is already going on, the User can:
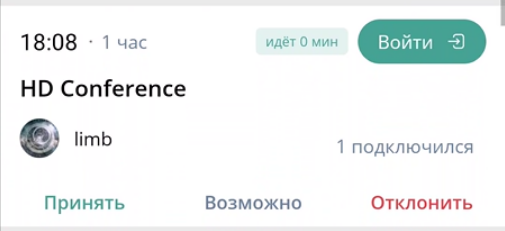
- Accept
- Decline
- Enter
STEP 5: Entering the event. Upon entering the event (depending on the template), you can:
- Turn on/off the microphone
- Turn on/off the camera
- Turn on/off the speaker
- Exit the event (do not confuse with ending the event)
- Start screen sharing
- You can also use the chat within the event.
How to Connect to an Event by ID
In this article, you will learn how to connect to an event by ID.
Connecting by ID makes the process of joining an event faster, safer, and more convenient for users.
Let's look at this process step by step.
STEP 1: Open the Connect app on your phone. In the navigation panel (at the bottom) go to the "Events" tab.
STEP 2: In the upper right corner, press the "ID" button.
STEP 3: In the window that opens, enter the event ID (numbers) in the field.
STEP 4: Press the "Connect" button.
STEP 5: In the window that opens, the following functionality becomes available:
- turn on/off the microphone
- turn on/off the camera
- turn on/off the speaker
- exit the event
- the "three horizontal dots" button for sound settings, changing the camera, raising a hand, sharing the screen.
STEP 6: If necessary, you can (temporarily) leave the event by pressing the "red" button.
STEP 7: And if necessary, return to the event by pressing the green "Enter" button.
How to Connect to an Event by ID as a "Guest"
In this article, you will learn how to connect to an event by ID as a "Guest".
Connecting by ID makes the process of joining an event faster, safer, and more convenient for users.
Let's look at this process step by step.
STEP 1: Open the Connect app on your phone. Be sure to fill in the "Server" field. The event organizer can provide server data.
STEP 2: In the welcome window, select "Connect by ID".
STEP 3: Fill in the event ID and press the "Connect" button.
STEP 4: Press "Enter" in the invitation form
STEP 5: In the "Guest" tab, fill in the "Name" field and press "Enter".
STEP 6: In the window that opens, the following functions become available:
- Turn on/off the microphone
- Turn on/off the camera
- Exit the event
- the "three horizontal dots" button for sound settings, changing the camera, raising a hand, sharing the screen.
How to Connect to an Event Using a Mobile Browser
In this article, you will learn how to enter an event through a mobile browser on the VKURSE platform.
This feature allows you to quickly connect to an event if you do not have access to a personal computer at the moment, or if you do not have a personal account from the VKURSE platform.
STEP 1: Follow the link Click on the received link to access the event. You can receive the link in an invitation post or request it from the organizer.
STEP 2: Entering the participant's name In the browser window that opens, enter your name in the corresponding field.

STEP 3: System login Press the "Enter" button to continue.
STEP 4: Entering the password (if required) If the event is password-protected, enter it in the corresponding field.

STEP 5: Confirming entry Press the "Enter" button to complete the login.
STEP 6: Waiting in the room (if provided) If the event involves a waiting room, you will be moved there and remain until your presence is approved.

STEP 7: Opening the event window After approval, a new window opens with access to the event.
